Quick Start Guide
- To get started in the Shared Cloud, you can sign up for an eLabInventory free trial here.
- After completing registration, you will receive an email to activate a new account.
- Once your account has been activated, you can login here
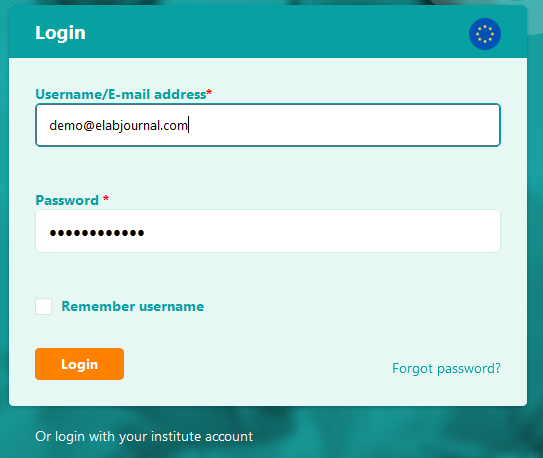
Enter the email address used to register your account and your password to log in. Note: If organisation login is active for your organisation (SAML/LDAP/AD), please use the institute login option. Note that if your organisation has a dedicated installation of the eLabInventory Private Cloud or eLabInventory On-Premise, the links for the account registration and login is different. Please contact the key-user in your organisation for the correct URLs.
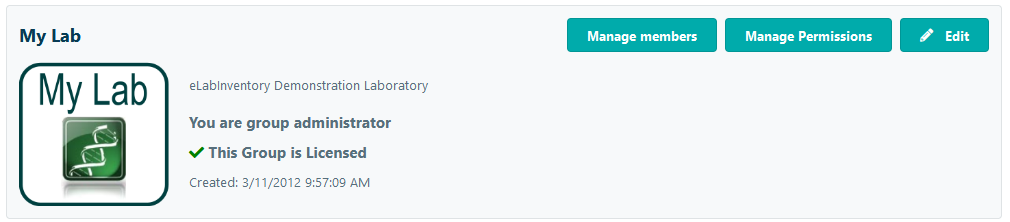
Create or Join a Group
After setting up your account, you will first need to set up a group in which you can organize and share data. A group is a secure environment for your lab, research group, or department within an academic institute or company where uses can collaborate on projects. If your lab is already using eLabInventory, you can ask your group administrator to invite you to join an existing group.
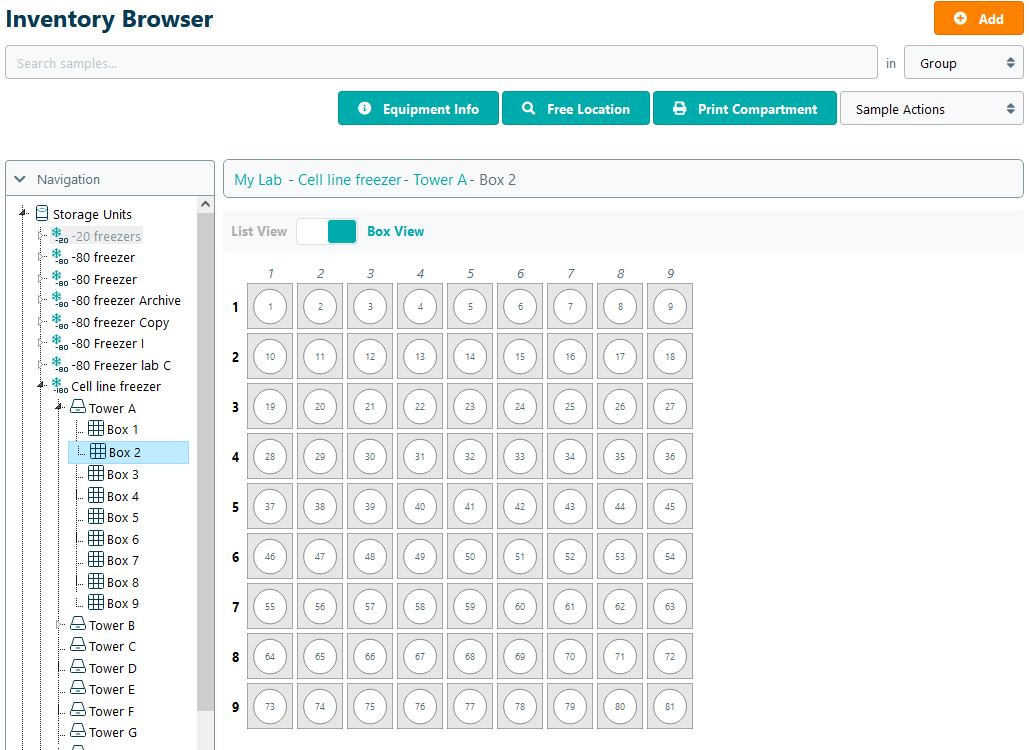
Set up sample tracking
In order to keep track of the samples used or generated in experiments, you first need to set up the inventory module. Start by creating a location, like a freezer, safety cabinet, or shelf to store samples. You can change the configuration of the freezer to align with the needs of the lab by adding additional compartment types, such as towers, racks, and sample boxes.
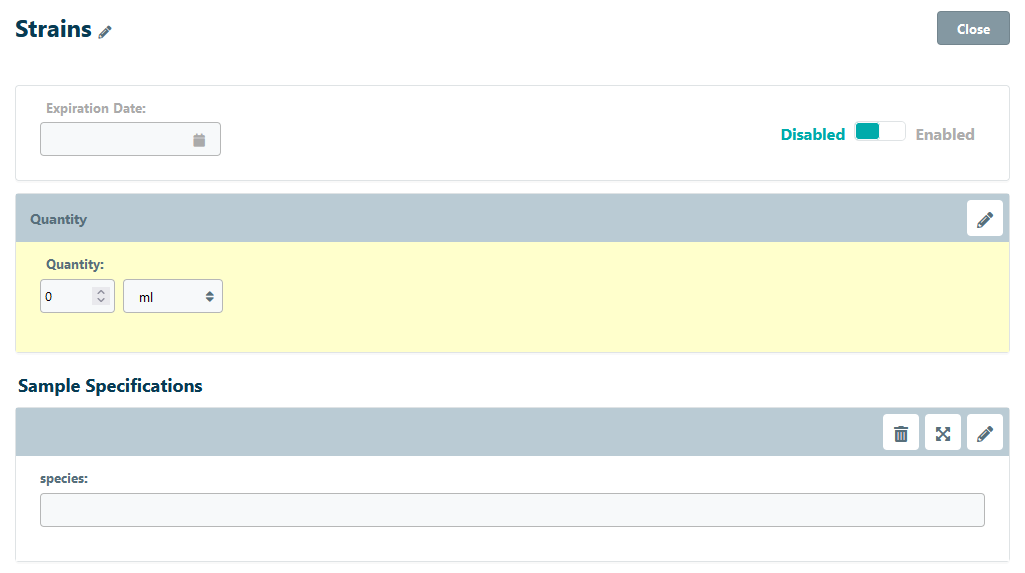
Before you can create a sample and add it to your storage compartment, you'll need to set up sample types for your lab. Sample types are a kind of template or standardized form that you use during sample data entry. If you work with plants for instance, you can set up a sample type for storing plant seeds; alternatively, a cell biologist might set up sample types for cell lines or tissue sample. For each sample type, you can add specific fields for the information you want to track. There are a number of different input types to choose from, including text, numbers, and dates; drop-down, radio buttons, and checkboxes; and fields to link samples or files. This template-driven format allows you to create custom sample types that are relevant to the work being performed in your lab.
Invite Lab Members and set Permissions
Once you have completed the basic system configuration, you are ready to invite your co-workers to join your lab and start tracking their lab results. If your lab is not yet licensed, please contact us to activate a 30-day, no-obligation, free trial for your lab.
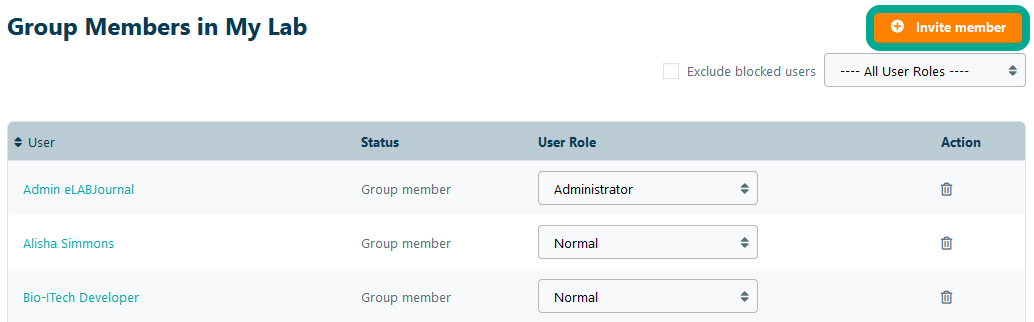
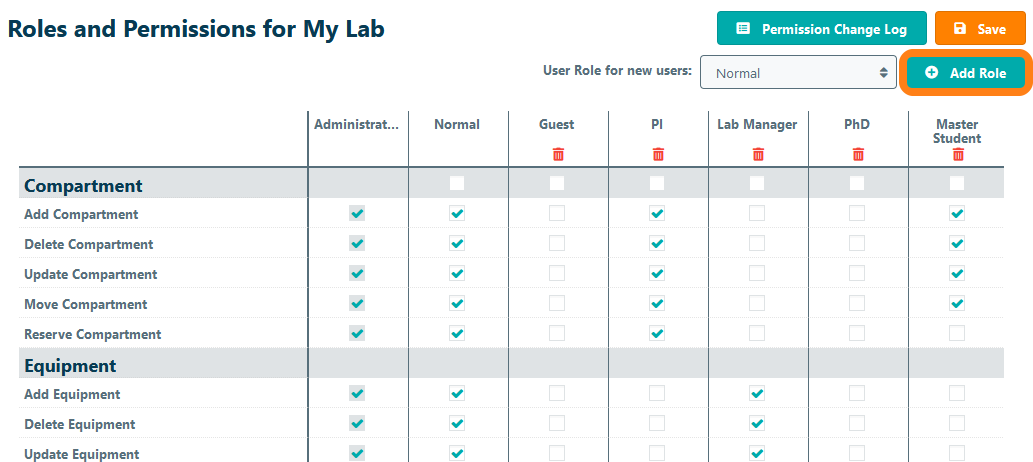
Once lab members are signed up, you can set permissions for each user by changing the user role. For each role, you can define permissions with respect to viewing, adding, updating and deleting samples. For example, permissions may be configured so that users can only view, update, or delete their own samples, but not those of other users.
Additional Configuration Options
Supplies and Stock Management
Set up a central product catalogue that allows lab members to easily (re)order chemicals and consumables as they are used in the lab. If you enable the quantity-tracking feature, items can automatically be added to the lab shopping list when the stock falls below a certain threshold. The lab manager can collect and approve orders periodically to centralize ordering within the lab. Please contact us to activate supplies ordering for your lab.
Equipment monitoring and booking
Set up equipment in the lab to monitor periodic maintenance, schedule validation events, or centralize equipment bookings through the device's planner. Use the eLabInventory Mobile App to see when a device is available and create an immediate booking for your experiment.
Sample Barcode Labelling
Install a your a supported lab printer and activate the corresponding add-on in our Marketplace to print barcode labels for your samples. Label your tubes and access all sample information by scanning the 2D QR code with the eLabInventory Mobile App.